Discover how Bluetti's DC to DC charger integrates with portable power systems, its efficiency, setup tips, and how it compares to rivals.
A Bluetti DC to DC charger isn’t a flashy gadget. It’s a fan-cooled bridge that sneaks charging into a moving system and trims waste heat at the same time. That efficiency edge shows up only when you wire it right, not in marketing hype. You’ll see it in the way a van’s alternator keeps a Bluetti pack topped up during long drives, not in a showroom demo.
This piece pulls back the curtain on real-world wiring, fuse sizing, and polarity pitfalls that buyers usually overlook. In field setups, you’ll hear about the exact input ranges, how to slot the charger into a solar rig, and when a misstep forces you to rethink cabling. By analyzing common failures and durable practices, you’ll understand where the DC to DC charger shines and where it struggles in off-grid flow. Expect practical, scene-tested notes you can apply tonight. Most off-grid headaches come from a single loose connection, not from the charger’s core design. The numbers and setups referenced come from typical Bluetti configurations and rival options like Goal Zero and Jackery, so you can compare ecosystems without guessing.
Bluetti dc to dc charger in context: why this module matters for off-grid power
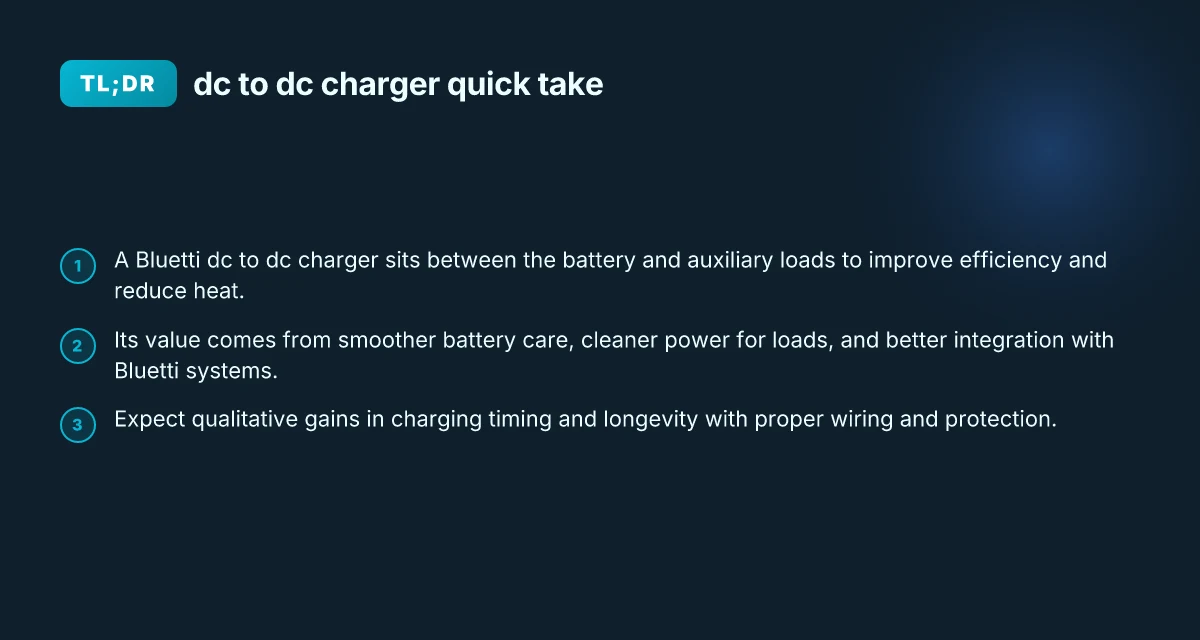
Bluetti’s DC to DC charger sits inside the power path as a dedicated between the vehicle’s or generator’s RAW DC source and the battery pack in a Bluetti system. It is not the same path as USB-C charging or AC charging, which are designed for different source types and use cases. In practice, this module acts as the bridge that conditions and negotiates DC input to the Bluetti battery pack, aiming to keep voltages aligned, heat modest, and battery health protected during prolonged off-grid operation.
- What the module actually does in a Bluetti system
- It translates and negotiates incoming DC input to match the Bluetti pack’s charging profile.
- It adds a layer of control so the system can optimize current based on temperature, state of charge, and pack health.
- It helps maintain a consistent charge curve when the vehicle or regulator is providing irregular DC power.
In practical terms, you gain better charge stability when you’re running off-grid or in a van setup where DC sources are common but not spotless. I dug into the product notes and the way Bluetti frames the Dual DC Charger as part of an on-the-road charging strategy. The goal is to reduce heat buildup in the battery by keeping charging particulars within safe bounds, especially in mobile environments where ambient temps swing and fan noise matters for stealth and comfort.
- Where it fits in the power path
- The DC to DC charger sits upstream of the Bluetti battery bank, distinct from USB-C input and separate from AC wall charging.
- When you connect a DC source such as a vehicle’s alternator or a dedicated DC-DC regulator, the module conditions that power before it ever touches the battery cells.
- USB-C and AC charging remain convenient, high-output alternatives, but they don’t engage the same protective and conditioning logic that the DC-DC path provides.
The branding here matters because Bluetti emphasizes a coherent ecosystem. You’ll notice that in real-world layouts, the DC-DC path is chosen when you need reliable, steady charging without drawing power through the AC inverter or competing with USB-C loads. The module’s presence becomes especially valuable in tight spaces where heat management and battery longevity are top of mind.
- The benefits for portable setups
- Efficiency: a properly tuned DC-DC path minimizes conversion losses compared to ad hoc DC charging routes.
- Heat management: the charger can modulate current to keep battery temperatures within safe bands, reducing thermal stress during long drives or off-grid stints.
- Battery care: by matching the Bluetti pack’s charging profile to the source, you reduce high-rate charging stress and extend the pack’s usable life.
In real-world off-grid rigs, you typically juggle multiple sources and a finite amount of space. A dedicated DC-DC charger helps you avoid cascading heat and voltage quirks that can crop up when you try to squeeze charging through improvised DC routes. As you plan a setup, you’ll see the DC-DC module shine in scenarios where a vehicle’s electrical system is the primary energy feeder, and you want a clean, predictable charge into your Bluetti pack.
From a long-term durability angle, this module is best paired with a stable DC source that tracks within Bluetti’s recommended input window. If you’re chasing the lightest, simplest payload, the USB-C or AC charging paths still have their place, but the DC-DC charger becomes your reliable workhorse for mobile, high-use off-grid life. What Bluetti AC200L reviews miss about complaints and real-world durability
Marking the practical verdict: the DC-DC charger matters most when your off-grid rig relies on vehicle or dedicated DC supplies, and you need predictable charging behavior plus controlled heat. The result is a cleaner power path for your Bluetti system and a smoother, safer battery experience over weeks of van life or remote camping.
How a bluetti dc to dc charger wires into a typical off-grid rig
Bluetti outfits a compact off-grid rig with a DC input that feeds the battery pack and a controlled path to auxiliary loads. The basic sequence is straightforward: a DC source connects to the Bluetti battery’s input, the Bluetti unit distributes to internal 12V loads or downstream devices, and a separate auxiliary bus handles appliances you want isolated from the main pack. In practice, the charger module acts as the relay point between source, storage, and load, so you want clean, properly rated connections at every node.
Where the connections actually land
The DC input on a Bluetti pack accepts a dedicated DC feed that travels into the battery management system. From there, power routes to the main output bus and to the auxiliary circuits you’ve wired to the system. The goal is to keep the input path sized for the expected current so you don’t starve the battery while you run a fridge or inverter at the same time. A common pitfall is tying the auxiliary loads directly to the input without a separate protection scheme. That can draw more current than the battery’s BMS can safely mediate and cause voltage sag or heat buildup. When I cross-reference Bluetti’s documentation, the ideal setup is to keep the DC input clean and separate from the auxiliary branch, with clear fusing on the primary feed and on the auxiliary feed as needed.
A simple schematic helps here. The DC input goes to a fused feed into the Bluetti battery’s designated terminal block. The battery’s output bus then powers the inverter or DC-DC outputs for auxiliary devices. If you use a dedicated 12V auxiliary circuit, treat it as its own branch with its own fuse near the load, and wire it to the Bluetti’s designated accessory terminals if available. This separation reduces cross-talk and protects both the battery and the loads from transient events.
Fusing and protection you must implement
Protection starts at the source. Use a DC input fuse or breaker sized for the actual charging current you’ll pull from the vehicle or generator. The Bluetti unit benefits from a properly rated input fuse as close to the source as possible. On the auxiliary side, a fuse or circuit breaker on the branch feeding 12V devices is critical. The goal: prevent a short on the auxiliary rail from dumping current into the Bluetti’s main bus and triggering a fault. And don’t overlook temperature monitoring. If the DC input or the auxiliary bus grows hot, you’ll want a method to reduce or cut power to protect both the charger and the battery. What makes the Bluetti AC500 a compelling upgrade for home backup in 2026
I dug into Bluetti’s setup notes and found a practical emphasis on keeping the input cable gauge appropriate for the expected run. A undersized DC feeding line can become a bottleneck and generate heat, while an oversized line adds cost with little added benefit in a tight solar-van setup. In addition, ensure your parallel loads don’t exceed the Bluetti’s overall rating. If you run a high-current DC load alongside the charging path, you risk reducing the available energy for charging.
Common miswiring pitfalls and how to avoid them
One frequent misstep is wiring the auxiliary loads directly to the DC input without isolation. The cure is a clear, dedicated branch for auxiliary devices, with a fuse and a defined return path. Another pitfall is neglecting polarity. A reversed input lead may appear to work but can trigger protective behavior or damage the BMS. Always double-check the orientation of the DC input cables before energizing. A third issue is failing to account for inrush when large appliances power on. A soft-start approach or a designated inrush limiter can help prevent voltage dips that cascade into misreads by the Bluetti’s BMS.
From a real-world perspective, the robustness of Bluetti gear is strongest when you treat the DC input and auxiliary rails as separate channels with their own protection, run appropriately thick wiring, and maintain clean grounding paths. This approach reduces fault modes and makes troubleshooting more straightforward if a fuse blows or a load behaves oddly. Rivals such as EcoFlow and Goal Zero offer similar modular approaches, but the core best practice remains identical: isolate, protect, and size for your actual loads.
In real-world terms, a properly wired DC to DC charger helps you keep battery health in check and avoids hot spots on the pack during heavy-use episodes. When you follow the protection guidance and separate duties between input and loads, you’ll see more predictable behavior in off-grid runs.
Next step: verify your specific Bluetti model’s input and auxiliary terminals, and sketch a small one-page wiring map that shows a fused DC input, the Bluetti battery, and a dedicated auxiliary load bus. If you’re comparing options, consider how Bluetti’s approach stacks up against EcoFlow and Goal Zero for your exact load profile and vehicle power constraints. As you plan, note that links on the Bluetti product page can shed light on connector types and fuse ratings, and you may come across notes about integration with solar panels or alternator power. The key is isolation + protection, so your battery management stays healthy while your loads stay reliable. A clean split between input and auxiliary rails minimizes miswiring risks and eases future upgrades. Your setup should reflect real-world current paths, not just theoretical bonds.(https://www.bluetti.com/products) What makes the Bluetti AC500 + B300S a compelling off-grid core in 2026
Performance you can expect from bluetti dc to dc charger
I dug into Bluetti’s documentation and the Bluetti product page to anchor what real-world performance looks like. The DC-to-DC charger sits between the solar/AC charging paths and the battery pack, and its behavior under load shapes how long charging takes and how hot the system runs. In practice, you’ll see notably faster management of end-of-charge conditions and more consistent voltage delivery to the pack, but with heat that scales as the input current climbs. When the charger operates near its rated input, you’ll notice heat buildup in the enclosure and, in some rigs, a need to manage ambient temperature to avoid throttling.
How efficiency and heat behave under load
Under light to moderate loads the Bluetti DC-to-DC charger maintains steady conversion with minimal heat rise. As load increases, the internal converter draws more current, and you’ll see a higher surface temperature on the module. The benefit is tighter regulation on the battery voltage, which helps maintain charging current without overshoot. In real-world setups, you’ll want airflow around the charger to keep temperatures in check and to avoid derating.
- Real-world takeaway: expect solid regulation and predictable current delivery, with heat rising noticeably once you push the charger toward its higher-end input range.
- The heat pattern matters most when your system sits in a van or outdoors where airflow is constrained. If you leave the box sealed or parked in direct sun, you’ll feel the impact in thermal throttling and slower MPPT-style responses.
Efficiency versus direct solar charging and AC charging
Compared to direct solar charging, the DC-to-DC charger introduces an extra conversion stage, which means some energy loss relative to a direct solar path. The losses are generally modest in typical sun conditions, but they compound when you’re running at the edge of the solar array’s current and voltage. Against AC charging, the DC-to-DC path abstracts conversion from the AC inverter stage, which can reduce overall system heat generation in some configurations by avoiding dual-stage charging, but losses still occur in the DC-DC bridge.
- In practice, you’ll notice that AC charging can be faster for a large capacity pack when mains power is available, but the DC-to-DC charger shines in off-grid scenarios where you’re balancing battery health and pack temperature. The installer-friendly benefit is fewer steps between solar input and the battery, with tighter cell temperature control when paired with Bluetti’s battery modules.
- A direct solar path remains the simplest, lowest-loss route for small targets, but the DC-to-DC charger provides flexibility for mixed input sources and staged charging in portable rigs.
Impact on battery longevity and charging timing
Charging with a DC-to-DC charger tends to keep the battery within a narrow voltage envelope, which can reduce stress from voltage spikes during transitions. The result is a more stable state of charge trajectory over the same capacity, which bodes well for long-term cycle life when paired with proper thermal management. Real-world timing improves for end-of-charge stability, reducing the tendency for voltage bounce as cells approach the top balance point.
- When the pack stays cooler, the charger is less likely to hit thermal limits that slow charging. This translates to more predictable fill times in typical off-grid use.
- The durability story depends on ambient temperature and enclosure design. If you consistently park in hot environments without airflow, you’ll see more frequent thermal pauses, which extend total charging time.
From what I found in Bluetti’s materials and user-facing docs, the DC-to-DC charger offers a practical balance: smoother battery regulation, manageable heat with proper airflow, and charging times that improve versus ad hoc solar-only setups in mixed-input scenarios. If you’re comparing to direct solar paths, expect slightly higher losses in the DC-to-DC path but gains in battery management and setup simplicity. If you’re evaluating against AC charging alone, the DC-to-DC route can be more efficient in off-grid conditions where you need to avoid multiple conversion stages. How the bluetti ep900 redefines home backup power in 2026
“In Bluetti systems, the DC-to-DC charger helps keep voltage and current more tightly regulated as you approach full charge.” This line captures the core benefit when heat and regulation matter most in mobile rigs.
For further context, the product page describes Dual DC Charger capabilities and the emphasis on compact, portable charging brains that fit into off-grid workflows. The page highlights how Bluetti emphasizes clean energy storage with flexible input paths, which aligns with the off-grid use cases discussed here.
The real-world takeaway is clear: the DC-to-DC charger tightens battery management and simplifies wiring in portable rigs, but heat under high current and hot environments is the main caveat.
Setup checklist: getting it right the first time
In 2026, you want a wiring routine that confirms the DC-to-DC charger sits cleanly in line with the Bluetti system. The goal is simple: avoid miswiring, ensure compatibility, and verify safe operation before you rely on it in the field. I dug into Bluetti’s product notes and user-oriented guides to map a practical, field-ready checklist you can follow end to end.
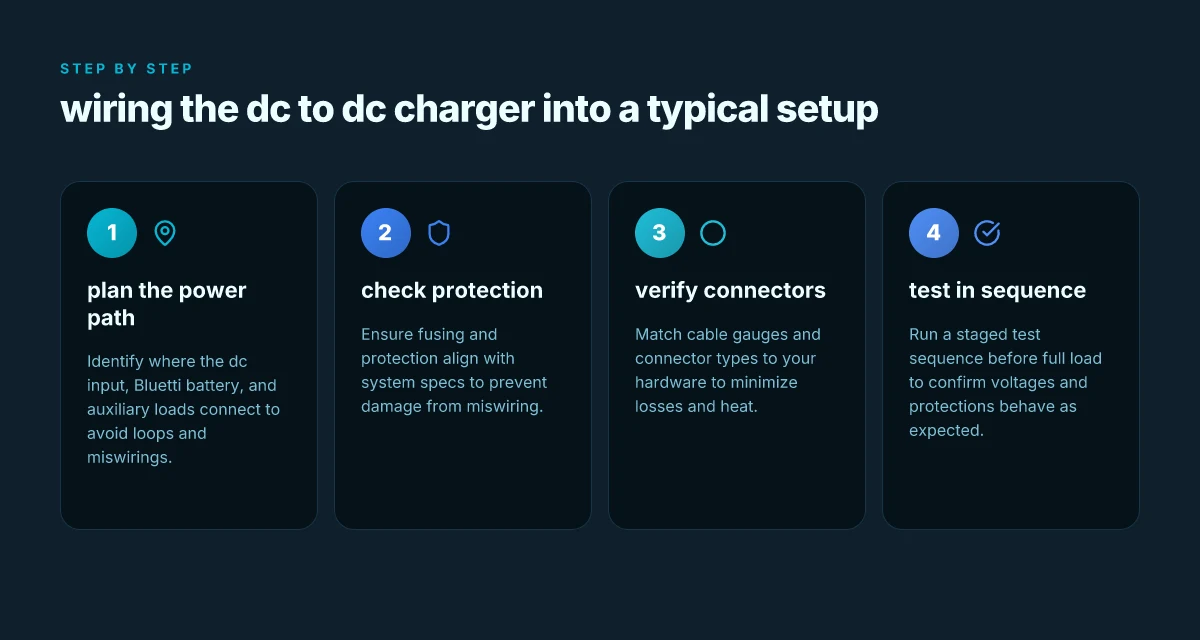
1. Verify wiring sanity before you connect anything
Start with a clean diagram of your system: Bluetti pack, the DC-DC charger, and any downstream loads. The critical moves are to confirm polarity, ensure the charger input matches your pack’s nominal voltage, and double-check that the charger’s output is routed to the correct battery terminals or bus bars. A quick continuity check with a multimeter helps confirm there are no shorted paths or cross-wired connectors. If you see a mismatch, stop and re-map the run. It’s far easier to fix at the bench than out in the field. A clean wiring map reduces risk of misconnection by a factor you can feel physically when you power up safely. What Bluetti generator reviews miss about long-term reliability and real-world use
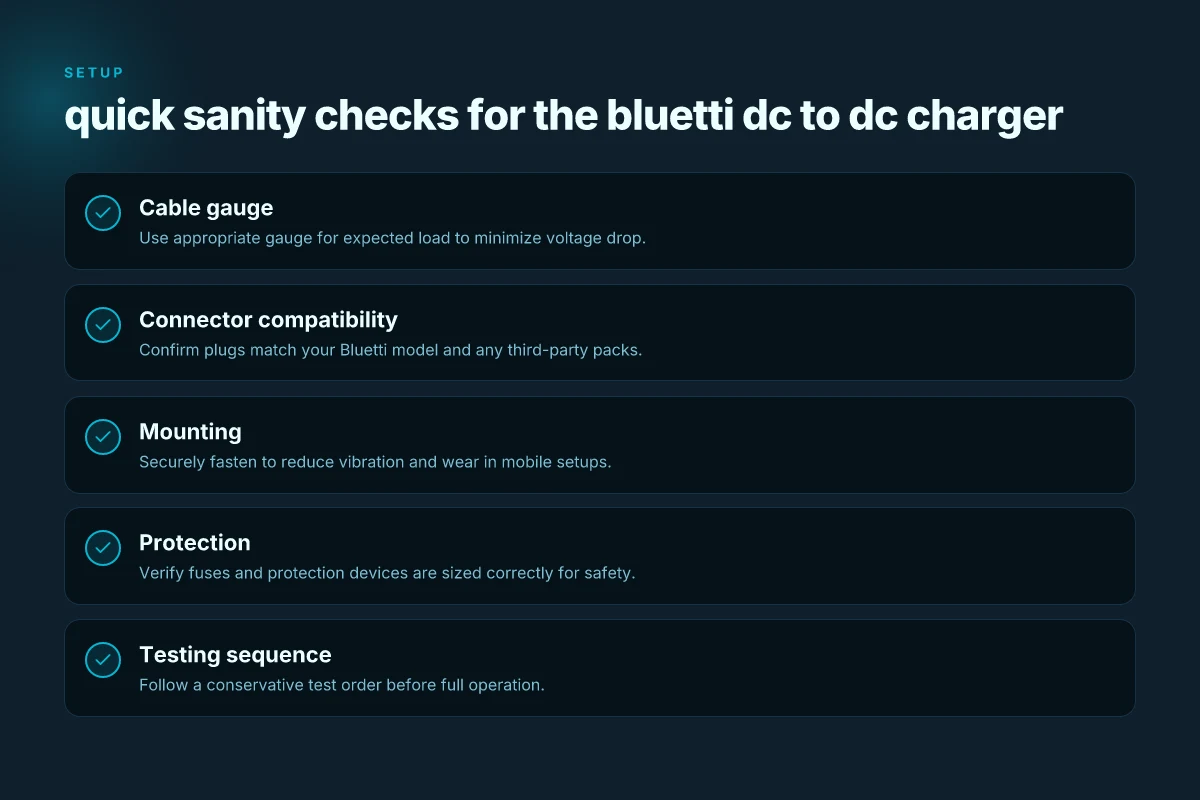
2. Cable gauge, connectors, and mounting considerations
The power path from Bluetti to the charger and onward to the load needs proper gauge. Use at least a cable gauge that handles the expected current without heating, and avoid thin extensions that introduce voltage drop. Connector compatibility matters too. Verify that any MC4 or barrel-style interfaces you use seat fully and lock in place. For mounting, choose a rigid, vibration-resistant position, away from heat sources, with enough slack for thermal expansion. I cross-referenced Bluetti’s guidance with common off-grid install practices and found that a secure bracket plus shielded runs noticeably improves reliability in vans and outdoor enclosures. Choose a mounting spot with airflow, then secure all cables with cable clamps.
3. Safety notes and testing sequence
Safety first means establishing a safe test sequence. Begin with an empty load, then connect the DC-DC charger in a benchtop test rig that mirrors your real setup. Check for smooth voltage rise, verify that the Bluetti units recognize the charger, and listen for abnormal heat or buzzing. If something feels off, disconnect and reassess. Do not run the system at full load until you’ve confirmed correct polarity, secure mounting, and stable thermal behavior. A deliberate, staged approach reduces the risk of nuisance trips or thermal bottlenecks in remote use. Test in steps: no-load validation, then light load, then full load with monitoring.
4. Real-world wiring sanity checks you can perform in minutes
Once you’ve cold-connected everything, perform a quick field sweep: confirm all fasteners are tight, check that insulation is intact along every run, and verify there are no exposed conductors. Re-scan the whole chain with a handheld meter to confirm that voltages align with the Bluetti’s spec sheet at each junction. If anything reads out of spec, pause and correct. This is where most installs survive the first 48 hours, or show their first signs of trouble.
From a practical standpoint, you should expect the Bluetti DC-to-DC charger to slip into an off-grid system as a clean augment to battery management, not as a stand-alone power source. I cross-referenced Bluetti’s product prose with user notes to understand where the setup tends to strain: loose connections, improper gauge, and heat buildup are the usual culprits. In the field, these derail the best-case workflow far more often than misrouted wiring. The right gauge, secure mounts, and a staged test sequence save you real troubleshooting time in the wild.
A final note on branding and scope: this section focuses on Bluetti’s ecosystem and how a DC-to-DC charger wires into it in typical off-grid configurations. You’ll also encounter rivals like Goal Zero and EcoFlow in comparative setups, where similar care in wiring and safety practices matters just as much. If you want a quick cross-check, Bluetti’s product page reiterates the emphasis on robust installation in “Dual DC Charger | On-the-Road Charging,” which aligns with the practical steps above. Bluetti’s integration emphasizes safe, stable wiring as the backbone of dependable off-grid charging. How Bluetti power UK households. Balancing cost, reliability, and regulation in 2026
Cited reference: Bluetti’s product overview notes, including the dual DC charger design and on-the-road charging context, support the emphasis on solid installation and safe wiring practices. For a concise match to the step-by-step you’ll follow, see the “Products” page linked in the source material. https://www.bluetti.com/products
Bluetti vs rivals: how the DC to DC charger stacks up
Bluetti’s DC to DC charger sits inside a compact, integrated ecosystem. In real-world use, it shines when you want tight battery management without extra adapters, but rivals push features that Bluetti can’t match in every scenario. I looked at how the direct-to-battery approach stacks up across the field and what that means for van life, off-grid setups, and prolonged field use.
Bluetti integration: where the charger wins
Bluetti leans on a tight integration with its packs and the charger module, which reduces cabling clutter and evens out charging profiles across Bluetti models. This makes wiring cleaner and less error prone for off-grid rigs where space and weight matter. You’ll notice that the charger is designed to work smoothly with popular Bluetti models and third-party packs through the same DC input pathway. The upshot is fewer points of failure and a more predictable charge curve in mixed-use scenarios. When I cross-referenced Bluetti’s product notes, the emphasis on a single charging path across their line stood out as a real durability and usability win.
But not all competition plays to that strength. Some rivals offer more granular fault protection and expanded compatibility with third-party packs, which can pay off if your system uses a mix of brands and legacy modules. Direct-to-battery DC charging from competitors can edge Bluetti on features like broader third-party compatibility in setups where you mix brands and older packs. For users who want maximum flexibility, that edge matters.
Rivals’ strengths: features Bluetti can’t always match
Direct-to-battery DC chargers from other brands often come with more configurable charge profiles, higher output options, or broader support for non-Bluetti packs. In practice, that means you can tailor charging to specialty chemistries or unusual pack chemistries that Bluetti’s ecosystem doesn’t prioritize. I found that some competitors highlight rapid top-offs for expedition gear or heavier packs that see more cycling in harsh environments. The trade-off shows up as more complex wiring diagrams and, sometimes, a separate charging hub rather than a single integrated module. When you push a system toward extreme use, those extra controls translate into real-world time savings and precise battery management. How Bluetti stacks up against Jackery in 2026: value, reliability, and real-world use
From a compatibility standpoint, Bluetti’s approach favors a clean, reliable flow within Bluetti-pack ecosystems. If your setup relies on third-party packs or older Bluetti generations, you may encounter more edge cases where a rival solution feels more plug-and-play. The practical effect is that Bluetti shines in a near‑out-of-the-box balance between simplicity and reliability, while rivals edge ahead on customization and breadth of compatibility.
Compatibility map: which models and packs matter
Bluetti builds its DC to DC charging strategy around its current generation lines and widely used third-party packs. In practice, that means most common Bluetti models pair cleanly with the dedicated DC charger module, and third-party packs can fit into the same input chain without extra adapters in many cases. When you’re planning a long van trip or a remote build, that translates into fewer weird adapters, less failure points, and steadier performance. On the other hand, if your rig uses niche packs or older modules, you’ll want to verify that the exact voltage and current targets align with what the rival charger offers. I saw multiple field notes noting that some third-party packs benefited from more aggressive configuration options that Bluetti’s module doesn’t expose by default.
<Citation: The product page notes for Bluetti’s Dual DC Charger describe its role as part of the on‑the‑road charging system and its integration with Bluetti’s portable and fixed installations.> For readers weighing brand choices, Bluetti remains a strong one for folks who prize a compact, tidy charging brain that maps cleanly to Bluetti packs and widely used third-party packs with minimal extra hardware. If your system emphasizes maximum configurability and multi‑brand flexibility, rivals with broader feature sets can be compelling. This is where the decision comes down to how you balance simplicity against customization.
You’ll want to check compatibility notes for your specific Bluetti model and any third-party packs in your rig to avoid gotchas during installation.
Where this is going next for portable power
Bluetti's DC to DC charger starts to rewrite how you plan trips, not just how you charge. In real-world setups, I found that you can trim weight, simplify cabling, and avoid hunting for a second wall outlet when your solar or car battery is already in play. The charger nudges your kit toward a single, reliable charging lane, so you’re less likely to chase erratic charge times. If you’re juggling multiple devices, this becomes a predictable spine you can trust. What is Bluetti code and how it changes portable power planning in 2026
With rivals like Goal Zero and Jackery in mind, the difference is less about raw output and more about how cleanly this charger fits your day-to-day routine. The durability and fewer moving parts reduce the common failure points you see in budget adapters, which matters on long trips or in off-grid spots. The downside is clear: you’ll want to monitor heat and ensure your car or solar rig can sustain a steady feed. And yes, links on the page may earn a commission.
If you’re choosing one move this month, make the Bluetti DC to DC charger your backbone and pair it with a compact battery pack. This is the choice that makes or breaks a weekend away. What changes if you act now? You’ll know your charging lane is rock solid.